
Home » 9. GUI » 9.2. GUI Widgets » JTextField
Category Archives: JTextField
Login Validation (GUI)
In the Owl Greeting example, users interact with only one GUI element, and the only interaction processed is when the Enter key is pressed. This is of course a rather restrictive example, as we would normally have many more GUI elements, and would like to process more than one interaction in a program.
Interaction with a Button
In the following program, you will see how we process the interaction when a user clicks a button. It is a simplified implementation of a login validation, where users are required to type in the username and password, then click the “Login” button. By clicking the button, the process of validating the username and password is triggered.
1 | import java.util.Arrays;
2 | import java.awt.FlowLayout;
3 | import javax.swing.*;
4 | import java.awt.event.*;
5 |
6 | public class Login extends JFrame implements ActionListener{
7 |   private JLabel userLabel, passwordLabel, validateLabel;
8 |   private JTextField userText;
9 |   private JPasswordField password;
10|   private ImageIcon valid, invalid;
11|   private JButton logButton;
12|   private String username = "root";
13|   private char[] correctPassword = { 'r', 'o', 'o', 't', '1', '2', '3' };
14|
15|   public Login(){
16| 	super("Login Validation");
17| 	setLayout(new FlowLayout());
18| 	userLabel = new JLabel("Username: ");
19| 	passwordLabel = new JLabel("Password: ");
20| 	validateLabel = new JLabel();
21| 	userText = new JTextField(15);
22| 	password = new JPasswordField(15);
23| 	valid = new ImageIcon("tick32.png");
24| 	invalid = new ImageIcon("cross32.png");
25| 	logButton = new JButton("Login");
26| 	logButton.addActionListener(this);
27| 	add(userLabel);
28| 	add(userText);
29| 	add(passwordLabel);
30| 	add(password);
31| 	add(logButton);
32| 	add(validateLabel);
33|   }
34|
35|   public void actionPerformed(ActionEvent e){
36| 	String usr = userText.getText();
37| 	char[] input = password.getPassword();
38|
39| 	if (usr.equals(username)) {
40| 	  if (Arrays.equals(input, correctPassword)) {
41| 	     validateLabel.setText("You have successfully logged in.");
42| 	     validateLabel.setIcon(valid);
43| 	  }
44| 	  else {
45| 	     validateLabel.setText("Sorry, password is incorrect.");
46| 	     validateLabel.setIcon(invalid);
47| 	  }
48| 	}
49| 	else {
50| 	  validateLabel.setText("Sorry, username does not exist.");
51| 	  validateLabel.setIcon(invalid);
52| 	}
53|   }
54|
55|   public static void main(String args[]){
56| 	Login window = new Login();
57| 	window.setDefaultCloseOperation(JFrame.EXIT_ON_CLOSE);
58| 	window.setSize(300, 180);
59| 	window.setVisible(true);
60|   }
61| }
The look and feel of the dialog you get depends on the computer you use to run the program. If you are using a Mac, this is what you see on screen after you compile and run the program:
 On line 1, we have included an import statement which enables us to use a predefined class called
 Arrays that is described in the java.util package. It is used on line 40, which will be explained later.
Notice the use of * (asterisks) in the import statements on lines 3-4. This is a shortcut that includes the whole package into the program. So, instead of specifically stating which predefined classes in the package we want to include with separate import statements, we just use one statement which covers everything described in the package. For example, line 3 allows us to use any GUI widgets described in the javax.swing package like JLabel, JTextField and JPasswordField. Line 4 allows us to use both ActionEvent and ActionListenerdescribed in the java.awt.event package.
In this example, we declare a couple of JLabel objects to display some text (line 7). We use userLabel and passwordLabel to indicate the corresponding text input areas, and validateLabel to display the validation message which will appear after users click the “Login” button. To accompany the validation message, we use two ImageIcon objects, valid and invalid (declared on line 10). We also declare userText as a JTextFieldobject which will be used by users to type in the username (line 8). On line 9, we declare password as a JPasswordField object for the password. JPasswordField is a subclass of JTextField, i.e. a special type of JTextField. This means that a JPasswordField object in general behaves like a JTextField object, but with some additional features, one of which is displaying the characters typed in as asterisks.
Last but not least, we declare logButton as a JButton object (line 11) which when pressed will trigger the validation process. As this is only a simplified example of a login validation process, we set the only valid username and password early in the program. Therefore, we have username as a String variable and the value is set to “root”(line 12). The password is set as “root123” which is stored in an array of characters called correctPassword. The reason we use an array of characters here instead of a String object like username will be explained later.
When the program executes, the statement on line 56 will create a Login object called window by calling the constructor method defined by lines 15-33. During this process, all the JLabel objects declared are created, but only userLabel and passwordLabel have their text value set(lines 18-20). On line 20, validateLabel is created with an empty text, as the text will be determined later. Similarly, other GUI objects are created and assigned with their corresponding values (lines 21-24). On line 25, a JButton object called logButton is created and labelled as “Login”. Because we want the program to initiate the validation process when users click this button, we need to register it to an event listener. Therefore, on line 26, we associate this button with ActionListener which is implemented by the current object (hence the use of ‘this‘), by invoking the addActionListener() method.
Statements on lines 27-32 add all the created and initialised GUI objects to be displayed in window. Since we set the layout manager as FlowLayout (line 17), the order in which these objects are added determines the order they are displayed, from left to right, and top to bottom.
During the execution of the program, when users click the “Login” button after typing in the username and password, the actionPerformed() method (lines 35-53), which describes the validation process will be executed. In this process, the username entered in userText is captured and stored in a String object called usr(line 36). The equivalent action for password is achieved by invoking the getPassword() method (line 37). This method however, returns an array of characters and not a String object like the getText() method used on line 36. Therefore we declare an array of characters called input to capture the text entered in password.
The first step of the validation process is to check whether the username is correct. This is easily achieved by comparing the text assigned in username with the text captured in usr, using the equals() method. This method is a method described in String class that returns true if both String objects are the same, and returns false otherwise. Therefore, we perform this comparison on line 39. If the username entered is correct, lines 40-47 will be executed to continue the process. Otherwise, lines 50-51 will be executed and the appropriate message and corresponding image are assigned to validateLabel. The following is an example of the output when the username is incorrect.
 For further validation, we need to check whether the password entered during execution is the same as the password assigned earlier. Since we capture the password entered as an array of characters, we can easily compare it with another array of characters. This is why we use an array of characters to store the value of
 correctPassword (line 13). This comparison is achieved by calling a static method called equals() which is described in the Arrays class. Notice that although this method behaves similar to and has the same name as the method used on line 39, they are not the same. Because we are using a static method, we call the method using the name of its class and not an object of its class, as shown on line 40. This method receives two sets of arrays as arguments and compares them. It returns true if both arrays contain the same values and returns false if otherwise. Consequently, if both the password entered and the pasword assigned are the same, lines 41-42 will be executed. The following is an example of the output when both the username and the password are correct.
 On the other hand, if the password entered and the pasword assigned are not the same, lines 45-46 will be executed. The following is an example of the output when the password is incorrect.

Interaction with Two Buttons
In this section you will see the program modified to introduce another button and see how the interaction with the button is handled.
1 | import java.util.Arrays;
2 | import java.awt.FlowLayout;
3 | import javax.swing.*;
4 | import java.awt.event.*;
5 |
6 | public class Login extends JFrame implements ActionListener{
7 |   private JLabel userLabel, passwordLabel, validateLabel;
8 |   private JTextField userText;
9 |   private JPasswordField password;
10|   private ImageIcon valid, invalid;
11|   private JButton logButton, resetButton;
12|   private String username = "root";
13|   private char[] correctPassword = { 'r', 'o', 'o', 't', '1', '2', '3' };
14|
15|   public Login(){
16| 	super("Login Validation");
17| 	setLayout(new FlowLayout());
18| 	userLabel = new JLabel("Username: ");
19| 	passwordLabel = new JLabel("Password: ");
20| 	validateLabel = new JLabel();
21| 	userText = new JTextField(15);
22| 	password = new JPasswordField(15);
23| 	valid = new ImageIcon("tick32.png");
24| 	invalid = new ImageIcon("cross32.png");
25| 	logButton = new JButton("Login");
26| 	logButton.addActionListener(this);
27|     resetButton = new JButton("Reset");
28|     resetButton.addActionListener(this);
29| 	add(userLabel);
30| 	add(userText);
31| 	add(passwordLabel);
32| 	add(password);
33| 	add(logButton);
34|     add(resetButton);
35| 	add(validateLabel);
36|   }
37|
38|   public void actionPerformed(ActionEvent e){
39| 	String usr = userText.getText();
40| 	char[] input = password.getPassword();
41|
42|     Object source = e.getSource();
43|     if (source.equals(logButton)){
44| 	  if (usr.equals(username)) {
45| 	    if (Arrays.equals(input, correctPassword)) {
46| 	       validateLabel.setText("You have successfully logged in.");
47| 	       validateLabel.setIcon(valid);
48| 	    }
49| 	    else {
50| 	       validateLabel.setText("Sorry, password is incorrect.");
51| 	       validateLabel.setIcon(invalid);
52| 	    }
53| 	  }
54| 	  else {
55| 	    validateLabel.setText("Sorry, username does not exist.");
56| 	    validateLabel.setIcon(invalid);
57| 	  }
58|     }
59|
60|   	if (source.equals(resetButton)){
61|       userText.setText("");
62|       password.setText("");
63|       validateLabel.setText("");
64|       validateLabel.setIcon(null);
65|   	}
66|   }
67|
68|   public static void main(String args[]){
69| 	Login window = new Login();
70| 	window.setDefaultCloseOperation(JFrame.EXIT_ON_CLOSE);
71| 	window.setSize(300, 180);
72| 	window.setVisible(true);
73|   }
74| }
The following is what you see on screen after you compile and run the program:
 We have added the declaration of another
 JButton object called resetButton on line 11. Then, we added two statements (line 27-28) to label the button as “Reset” and register it to the same event listener as logButton. And on line 34, we add this button to be displayed between the logButton and validateLabel.
In this modified example, users are presented with two buttons they can interact with, the “Login” and “Reset” buttons. If a user clicks on the “Login” button, the program will start the validation process just like in the original version. If the user clicks on the “Reset” button, both text areas will be cleared so a new username and password can be typed in. So, different processes for different buttons.
Since both buttons are associated with the same event listener, we need to make it differentiate between the buttons. On line 42, we use a method called getSource() which is inherited from EventObject, a superclass of ActionEvent. This method returns an object of Object class, which we capture as source. We then check whether source is the same object as logButton (line 43). In other words, when a user clicks a button, an event occurs. With the getSource() and equals() methods, we can check whether the event is triggered by logButton. If it is, the process of validation (lines 44-58) will start. Then, on line 60, we check whether the event is triggered by resetButton. If it is, the statements on lines 60-65 will be executed. This means both text areas and validation message will be cleared.
Handling Events with Separate Listeners
A more common way to perform event handling for more than one GUI elements is using separate event listeners. Therefore, we modify the above program to include two separate listeners, one for the “Login” button, and one for the “Reset” button. The following is the modified program:
1 | import java.util.Arrays;
2 | import java.awt.FlowLayout;
3 | import javax.swing.*;
4 | import java.awt.event.*;
5 |
6 | public class Login extends JFrame{
7 |   private JLabel userLabel, passwordLabel, validateLabel;
8 |   private JTextField userText;
9 |   private JPasswordField password;
10|   private ImageIcon valid, invalid;
11|   private JButton logButton, resetButton;
12|   private String username = "root";
13|   private char[] correctPassword = { 'r', 'o', 'o', 't', '1', '2', '3' };
14|
15|   public Login(){
16| 	super("Login Validation");
17| 	setLayout(new FlowLayout());
18| 	userLabel = new JLabel("Username: ");
19| 	passwordLabel = new JLabel("Password: ");
20| 	validateLabel = new JLabel();
21| 	userText = new JTextField(15);
22| 	password = new JPasswordField(15);
23| 	valid = new ImageIcon("tick32.png");
24| 	invalid = new ImageIcon("cross32.png");
25| 	logButton = new JButton("Login");
26| 	logButton.addActionListener(new LoginListener());
27|     resetButton = new JButton("Reset");
28|     resetButton.addActionListener(new ResetListener());
29| 	add(userLabel);
30| 	add(userText);
31| 	add(passwordLabel);
32| 	add(password);
33| 	add(logButton);
34|     add(resetButton);
35| 	add(validateLabel);
36|   }
37|
38|   public static void main(String args[]){
39| 	Login window = new Login();
40| 	window.setDefaultCloseOperation(JFrame.EXIT_ON_CLOSE);
41| 	window.setSize(300, 180);
42| 	window.setVisible(true);
43|   }
44|
45|   class LoginListener implements ActionListener {
46|     public void actionPerformed(ActionEvent e){
47| 	  String usr = userText.getText();
48| 	  char[] input = password.getPassword();
49|
50| 	  if (usr.equals(username)) {
51| 	    if (Arrays.equals(input, correctPassword)) {
52| 	       validateLabel.setText("You have successfully logged in.");
53| 	       validateLabel.setIcon(valid);
54| 	    }
55| 	    else {
56| 	       validateLabel.setText("Sorry, password is incorrect.");
57| 	       validateLabel.setIcon(invalid);
58| 	    }
59| 	  }
60| 	  else {
61| 	    validateLabel.setText("Sorry, username does not exist.");
62| 	    validateLabel.setIcon(invalid);
63| 	  }
64|     }
65|   }
66|
67|   class ResetListener implements ActionListener {
68|      public void actionPerformed(ActionEvent e){
69|         userText.setText("");
70|         password.setText("");
71|         validateLabel.setText("");
72|         validateLabel.setIcon(null);
73|      }
74|   }
75| }
On line 6 we deleted the ‘implements ActionListener‘ because we do not need the Login class to ‘listen’ to any events anymore. Instead, we have two additional classes which will specifically created for this purpose. The two classes are called LoginListener (lines 45-65) and ResetListener (lines 67-74). As indicated by their names, LoginListener will invoke its actionPerformed() method (lines 46-64) whenever a user click the “Login” button. This association is done by registering logButton with LoginListeneras shown on line 26. Similarly, ResetListener will invoke its actionPerformed() method (lines 68-73) whenever a user click the “Reset” button. And this association is done by registering resetButton with ResetListener as shown on line 28.
Notice that both LoginListener and ResetListener are defined inside the Login class. This means that both these classes are inner classes of the Login class, which enables them to access and modify attributes of the Login class. For example, the actionPerformed() method in LoginListener accesses userText(line 47) and password(line 48), and modifies validateLabel(lines 52,53,56,57,61,and 62). If LoginListener was defined outside the Login class, this process would not be possible. If you are interested in a more detailed explanation of inner classes and the scope involved, you need to read it here.
Owl Greeting (GUI)
Receiving and processing input in the command line environment (shown in the Customised Hello and Area of Rectangle examples) seems pretty straight forward. Interactions with users are accomplished through instructions or questions which are then followed by the user’s input. This makes the placing of statements to capture and process input to a program easy to do. In a GUI environment, however, users can interact with more than one GUI widget in any order they see fit. Therefore, handling this flexibility requires a little bit of work. In the following program, you will see how input from interaction with a widget is processed.
This example is presented in two stages. In the first stage, you will see how we display some GUI widgets. However, when you run the program, it will not respond to any of your interaction. You will see how your interaction is processed and responses are executed in the second stage.
Displaying GUI Widgets
Here is the program for the first stage:
1 | import javax.swing.JFrame;
2 | import java.awt.FlowLayout;
3 | import javax.swing.JLabel;
4 | import javax.swing.JTextField;
5 |
6 | public class OwlGreeting extends JFrame {
7 |    JLabel labelQuestion;
8 |    JTextField textAnswer;
9 |
10|    public OwlGreeting(){
11|      setLayout(new FlowLayout());
12|      labelQuestion = new JLabel("Whooooo's there?");
13|      textAnswer = new JTextField(10);
14|      add(labelQuestion);
15|      add(textAnswer);
16|    }
17|
18|    public static void main(String args[]){
19|      OwlGreeting window = new OwlGreeting();
20|      window.setDefaultCloseOperation(JFrame.EXIT_ON_CLOSE);
21|      window.setSize(275, 100);
22|      window.setTitle("Owl Greeting");
23|      window.setVisible(true);
24|    }
25| }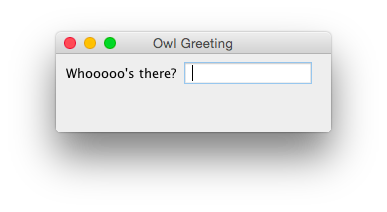
Notice that we have extends JFrame after the class name (line 6). This makes our class, OwlGreeting, an extension of the JFrame class, which means it will behave like a JFrame, but with some additional features. In other words, you can add the functionality you need, while having all the necessary features of a JFrame window. This concept of extension is called inheritance. If you are interested, you can find out more about inheritance here. You might think this is a complicated way of using JFrame compared to the previous example. However, it is actually the standard way, because it allows a lot of flexibility in your program.
In this example, we use two GUI widgets: a label and a text field. The label is used to display a question and the text field is used to receive the user’s input. These two items are the additional features that you want to add to your class. Therefore, we need to declare them as class members of OwlGreeting. This is done by placing the declaration statements for these widgets in the beginning of the class, as shown on line 7-8.
We also need a constructor method (lines 10-16) which contains the statements that describe the process that we want to happen when an object of this class is created. On line 11, we set the layout manager as FlowLayout. On line 12 we create a label to display the question, and on line 13 we create a text field to allow users to type in the answer. Then, on lines 14-15 we add these two items to be displayed. Notice that the name of the constructor method is the same as the name of the class, and there is no keyword class in between public and the name of the method. This is how you declare a constructor method and differentiate it from other methods in the class (if any).
Although the constructor method is written before the main method, it does not mean that the statements inside it are executed before the statements in the main method. Always remember that the flow of execution of your program starts from the main method. Therefore, in this example, the first line to be executed is line 19. However, since line 19 invokes the creation of an object of the OwlGreeting class, which calls the constructor method described by lines 10-16, the next statement to be executed after line 19 is line 11. This is then followed by lines 12-15. Then, the flow of execution goes back to line 19, and the rest of the statements in the main method are executed.
Handling Input from GUI Widgets
In Java, responding to interactions with GUI widgets is accomplished through the process of handling events. Therefore, you need to first understand the general concept of event handling. Events are triggered by the system every time a user interacts with a GUI widget, for example, clicking the mouse or pressing a key. To process an event, we need an event listener. The role of an event listener is to listen for an event. Whenever an event is triggered, it will invoke its handler which will execute the responses as programmed.
Different GUI widgets trigger different types of events. Each type of event is listened for by its corresponding listener. A lot of events occur during the execution of a program. However we only need to handle the events that we are interested in. Therefore, you need to register an appropriate listener with a GUI widget. The type of listener depends on the type of event you are interested in. An event listener and its handler need to be implemented through a class. In other words, you need to have a class, and in this class you have a special method that implements the handler. This method needs to contain with statements that describe the responses you intend.
To summarise, we need to include the following actions in our program:
- Implement the event listener using a class
- Implement the associated handler inside the class
- Register the event listener with the GUI widget that would trigger the event
Now, let’s see how we want the the program to respond. In this example, when the user enters a name in the text field and press , we want the program to display a greeting message. Assuming the user enters Fred and presses the key, the output will look like this:

In this example, the event we are interested in is triggered when the user presses . This type of event is defined in a class called ActionEvent and the event listener associated with this event is called ActionListener. ActionListener has a method (or handler) called actionPerformed() which will be invoked when an ActionEvent is triggered. To register an ActionEvent with its listener, we need to call the addActionListener() method.
Here is the modified program:
1 | import javax.swing.JFrame;
2 | import javax.swing.JLabel;
3 | import java.awt.FlowLayout;
4 | import javax.swing.JTextField;
5 | import javax.swing.ImageIcon;
6 | import java.awt.event.ActionListener;
7 | import java.awt.event.ActionEvent;
8 |
9 | public class OwlGreeting extends JFrame implements ActionListener{
10|    JLabel labelQuestion, labelGreeting;
11|    JTextField textAnswer;
12|    ImageIcon owl;
13|
14|    public OwlGreeting(){
15|      setLayout(new FlowLayout());
16|      labelQuestion = new JLabel("Whooooo's there?");
17|      textAnswer = new JTextField(10);
18|      labelGreeting = new JLabel();
19|      owl = new ImageIcon("animal39-2.png");
20|      textAnswer.addActionListener(this);
21|      add(labelQuestion);
22|      add(textAnswer);
23|      add(labelGreeting);
24|    }
25|
26|    public static void main(String args[]){
27|      OwlGreeting window = new OwlGreeting();
28|      window.setDefaultCloseOperation(JFrame.EXIT_ON_CLOSE);
29|      window.setSize(275, 100);
30|      window.setTitle("Owl Greeting");
31|      window.setVisible(true);
32|    }
33|
34|    public void actionPerformed(ActionEvent e){
35|      String name = textAnswer.getText();
36|      labelGreeting.setText("Hoot for " + name + "!");
37|      labelGreeting.setIcon(owl);
38|    }
39| }
The message is displayed in a label which contains some text preceeded by an image. Therefore, we need another label and an image icon. As shown on line 5, we add a statement to include the ImageIcon class. Then, on line 12, we declare owl as an object variable of ImageIcon, and on line 19 we create the object. Similarly, we declare labelGreeting as an object variable of JLabel, and on line 18, we create the object.
Both ActionEvent and ActionListener are defined in the java.awt.event package. Therefore, we add the statements on lines 6-7. As mentioned earlier, an event listener and its handler need to be implemented in a class; not necessarily a separate class, but a class. Therefore, since we are only handling one type of event, we will just use the class we have, the OwlGreeting class. Notice that on line 9, we have added the implements ActionListener. This means that not only does our OwlGreeting class work as a JFrame window, it also functions as an event listener. Consequently, we also added the description of a method called actionPerformed() as shown on lines 34-38. In this method, we have statements that will be executed when the user presses .
On line 20, we register textAnswer with the event listener by calling the addActionListener() method. The parameter this in this method refers to the object of a class that implements an ActionListener, which is the same object that calls the method. Hence the keyword this. You will find the this keyword used in many Java examples that use a similar concept of referring back to the object itself. If however you use a separate class to implement the event listener, you should replace it with the object variable of that class.
